When it comes to marble floors, one of the most common questions is whether they need to be polished after installation. The answer is usually yes, and there are several compelling reasons. Polishing not only enhances the beauty of your marble, but it also extends its life and durability.
Importance of Marble Polishing
1. Surface defects
Marble, as a natural stone, often has some inherent imperfections on its surface. These imperfections include small bumps, depressions and uneven areas that are not noticeable before the marble is laid. Without polishing, these imperfections can affect the overall appearance of the floor, making it appear dull. Polishing helps to eliminate these irregularities, creating a smooth and beautiful surface.
2. Enhance beauty
One of the main reasons marble is polished after it has been laid is to enhance its beauty. Polished marble has a light-reflecting quality that brings out the natural color and texture of the stone, creating a stunning visual effect. This lustrous surface can transform a space, making it look more elegant and sophisticated. Without polishing, marble can appear dull and lackluster, failing to fully showcase its beauty.
3. Improve durability
Compared to other flooring materials, marble is relatively soft and susceptible to scratches, stains and wear over time. A polished surface creates a protective layer that helps prevent these problems. Polished marble floors are less likely to absorb stains and liquids, making them easier to clean and maintain. In addition, the smooth surface reduces the risk of scratches, which can extend the life of the floor.
4. Maintenance and cleaning
Polished marble is easier to care for than unpolished marble. The smooth surface prevents dirt and grime from settling, allowing for faster, more efficient cleaning. Regular maintenance, such as sweeping and mopping, is also easier, and polished surfaces can be easily restored to their original condition with regular re-polishing.
5. Professional completion
Finally, polishing marble after it’s been laid creates the professional results often seen in high-quality installations. Whether in residential or commercial settings, polished marble floors convey a sense of luxury and attention to detail. This is especially important in spaces such as hotels, restaurants and high-end residences, where flooring plays a large role in the overall design aesthetic.
How to Polish Marble Correctly?
1. Clean the floor
Before you begin polishing, it is vital to thoroughly clean your marble floor. This step ensures that any dirt, dust, or oil on the surface is removed, allowing for a more effective polishing process.
Use a pH-neutral cleaner: Choose a cleaner designed for marble to avoid damaging the stone. Avoid using acidic or abrasive cleaners as they can corrode the surface.
Mop and rinse: Mop the floor with detergent and then rinse with clean water to remove residue. Allow the floor to dry completely before proceeding to the next step.
2. Preliminary polishing
Once the floor is clean and dry, you can begin preliminary polishing. This involves using different grades of sandpaper and grinders to gradually sand the floor surface.
Use coarse sandpaper first: Start by using 50 grit sandpaper to remove any obvious blemishes and scratches. You can use a floor sander or a handheld sander for this step.
Gradually increase the grit of the sandpaper: Use 200 grit, then 400 grit, then 800 grit, and finally 1500 grit. Each additional grit will smooth the surface and prepare it for final polishing. Make sure you sand the surface long enough each time to achieve the best results.
3. Apply polishing powder
After the initial polish, it’s time to apply a polishing powder to enhance the marble’s shine.
Choose the right polishing powder: Choose a polishing powder that is suitable for marble. There are many types of polishing powders available on the market. If you are not sure, please consult a professional or supplier.
Spray evenly: Lightly sprinkle the polishing powder onto the floor, making sure it is evenly distributed. This will help achieve an even sheen.
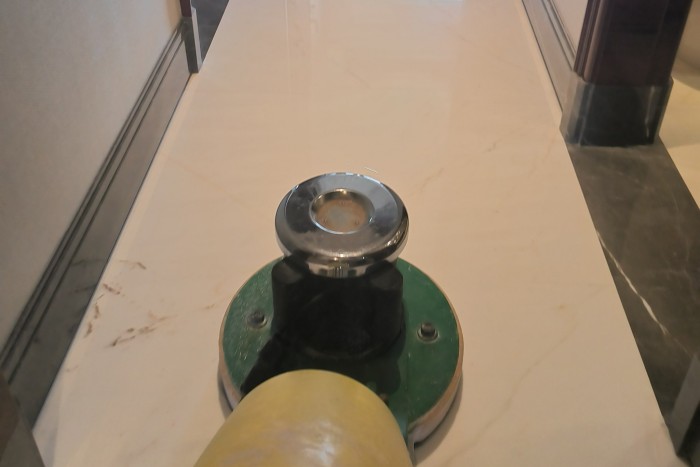
Use a polishing machine: Use a polishing machine to work the powder into the marble. Move the machine in a circular motion to ensure thorough coverage and maximize polishing results.
4. Clean again
Once polishing is complete, the floor must be cleaned again to remove any remaining polishing powder.
Mopping: Use a clean mop and a pH-neutral detergent to remove any remaining polish. This step is crucial to prevent any residue from affecting the shine of your floor.
Rinse thoroughly: Rinse the floor with clean water and allow to dry completely.
5. Waxing
To protect the polished surface and enhance its shine, it is recommended to apply a suitable marble wax.
Choose the right wax: Choose a high-quality marble wax designed to provide a protective layer while enhancing shine.
Apply evenly: Use a clean cloth or applicator to evenly apply wax to the surface. Follow the manufacturer’s instructions for best results.
Polish finish: After the wax has dried, polish the surface with a soft cloth to achieve a brilliant shine.
Post time: Apr-18-2025